

Solidity is a javascript like a language used to code smart contracts on the Ethereum platform. It compiles into a bytecode format that is understood by the Ethereum Virtual machine (EVM). It’s a strongly typed language with the ability to define custom data structures. Introduction to Solidity part 1 will teach you to utilize a subset of solidity functionality to create a template of a smart contract that can be re-applied to formulate a complete set of contracts that house data and basic logic that works for any domain. This will be a multi-part series as it will cover basic contract design and some related concerns.
Introduction to Solidity: Creating an environment
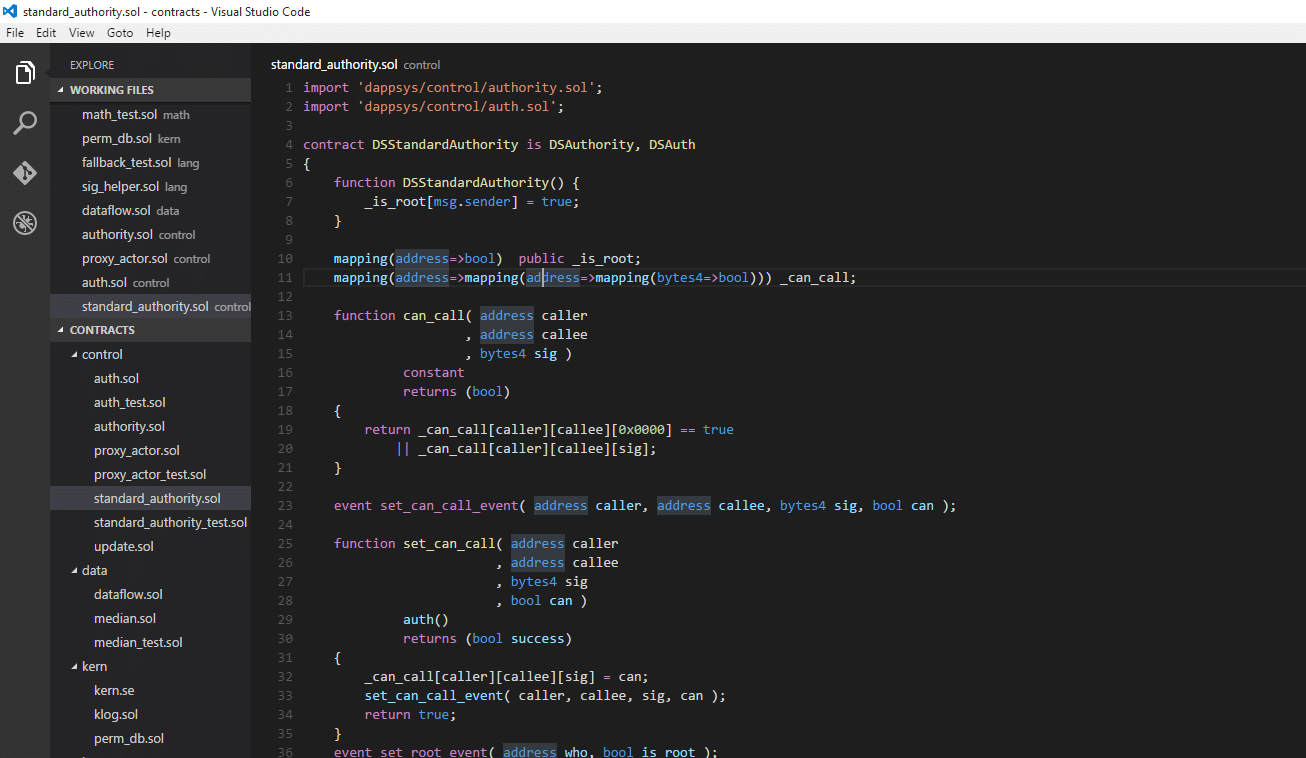
To execute smart contracts, we need a system that is able to compile, deploy and call its methods. For all the three we have a very simple integrated browser based app here.
It is possible to use this tool to connect with a live Ethereum node or to form a mock environment. This environment can also easily execute some test cases on the contract methods. It doesn’t need any install and is completely browser based. I have used it on chrome over ubuntu, but I’m sure it works just as well on other platforms. The left pane of the app is where the contract code is, and the right side has deployment and test options. The app can work on contract files from own systems.
The source code of the contract we will be discussing is available here. Some parts of the contract code are going to be discussed in the later parts of the series. The code and be downloaded and loaded into Remix to view the sections that are discussed below. Solidity latest unreleased version is 4.10 nightly and we will be relying on features supported by that specific version.
DataContract (Basic data structure):
A data contract is not standard terminology. There multiple types (patterns) of smart contracts defined on Monax (earlier Eris industries) documentation. The “data” type of contract is a simple concept where data is added, updated, removed and accessed. In the process of creating data contract, we will be able to work with an Access Control List (ACL) contract which can be used to manage role-based security on all contract types, Eventing mechanism for logging and returning data and some other features of smart contracts.
To create a simple data contract, assume a user defined high-level data set for e.g. Customers
To simplify, we structure a simple Customer whom we assume to be an individual:
struct Customer
uint id;

string name;

uint dateOfBirth;

uint social;

uint status;
Data Status
We are implementing the struct with the assumption that each data record will have a status. It is not feasible to delete and record and rearrange the entire collection, so status is an attribute that we will leverage to define a state for the record. Contracts in different domains will have a different set of status. As a simple assumption we are following 3 statuses (This is with the thought that a customer might be pending verification, active or might be deleted):
uint constant active = 1;

uint constant pending = 2;

uint constant deleted = 3;
A deleted record for any reference data type on a blockchain should never get hard deleted, so it is an appropriate design practice to assign a status to each record.
Our objective is to enable a collection of Customer struct instances on the blockchain and facilitate the ability access a specific customer, the list of call customers, and update a specific customer instance. A cross-cutting concern with these objectives is to enable logging and implementing an Access Control Strategy.
To create a collection we will leverage the mapping construct.
mapping (uint => Customer) customers;
mapping (uint => Customer) customers;
This mapping is the template for a map like structure that creates a map of key values where key is an unsigned int and value is an instance of a customer. This mapping has some limitations, which is that there is no way to loop through it to retrieve all the values. We can only access the elements through a specific get logic:
customers[key];
Due to this, we will have to maintain a shadow key to maintain a count of elements in the mapping and retrieve it based on the count.
public uint count = 0;
Now we have our data structure ready that we will be used to house the customer data.
Data Contract (Data Creation):
To create a customer instance and key it off we will implement a method that will accept constituent data.
function create Customer(uint id, string name, uint dateOfBirth, uint social)

customers[count] = Customer(id, name, dateOfBirth, social, pending);

count++;
The above method adds data to the mapping and increments the shadow key count. What is to be noted is that we are using the same shadow key to key off the data.
To access data randomly, we will need to supply a specific key against which we have keyed off the data.
function getCustomer(uint index)
constant returns (uint id, string name, uint dateOfBirth, uint social, uint status)
id = customers[index].id;

name = customers[index].name;

dateOfBirth = customers[index].dateOfBirth;

social = customers[index].social;

status = customers[index].status;
This method is a constant one as it does not change the state of the contract data (it’s a read-only method). So to call this method we will not need any gas.
To access all the customers we will have to leverage the count shadow key. We will need to implement the looping structure on the client and reuse the index based call above. This will be explained the contract client explanation.
To access the customer based on a specific attribute in a struct, We will have to implement a loop based brute search. There are more efficient ways to reading it using parsing the transaction that was responsible for creating that data.
function getCustomerById(uint id)
constant returns (uint idRet, string name, uint dateOfBirth, uint social, uint status)
for (var i=0; i< count; i++)


if (customers[i].id == id)

idRet = customers[i].id;

name = customers[i].name;

dateOfBirth = customers[i].dateOfBirth;

social = customers[i].social;

status = customers[i].status;

return;
This is a very inefficient way to retrieve the customer from an attribute value. There are also other issues with this method apart from inefficiency. It’s not possible to easily match strings in solidity, so it’s not possible to match string attributes. Also, it returns the first match, it’s not possible to return a list of matches. We will go into more efficient methods to access this data in later parts of this series.
Data Contract (Data Update):
The update data method is simply reverse of the access method. The only thing to remember is that this method results in a change for the blockchain state so the changes will only reflect once the transaction is confirmed. We will discuss how to ensure that transaction is confirmed before we try to access the data in later part of our series.
function updateCustomer(uint index, string name)

customers[index].name = name;
It makes sense to put some checks for index value (It has to be less than the count)
function updateCustomer(uint index, string name)

if (index > count) throw;

customers[index].name = name;
function updateCustomerStatus(uint index, uint status)

if (index > count) throw;

customers[index].status = status;
The different method should be implemented for updating each attribute, here we are updating the name. The method updateCustomerStatus() should be treated as a special method that can enable or disable records.
It’s possible to add the same check on the access method that accesses the index key, but it’s not necessary as the return will null in case the invalid index is supplied, so the client should be able to validate the response and return suitable errors. Since access would be a more frequently called method set, it should be made as efficient as possible.
Testing the contract:
To test the contract, go to the environment tab on the right panel (the box icon).
You will see the contract listed on the right with the with the option to provide an address (At Address) and an option to Create. Select the javascript VM radio button (Selected by default and hit create). This will create a local in-browser environment for you to execute tests on your contract and event debug it.
![Introduction to Solidity: Creating a data contract [Part 1]](https://blockgeeks.com/wp-content/uploads/2017/05/screen_1.png)
![Introduction to Solidity: Creating a data contract [Part 1]](https://blockgeeks.com/wp-content/uploads/2017/05/screen_2.png)
This test environment gives you the ability to call contract methods individually and see the results on the data.
To start with let’s call the create Contract method to add some data onto the blockchain (not the real one yet, but mock one).
Look for the red marked button with the method call createCustomer and add parameters to the text field next to it separated by commas like you would if you were calling this method through a javascript client. For e.g. (For simplicity we have chosen dateOfBirth to be of the unit timestamp which can fit into a unit)
For e.g. (For simplicity we have chosen dateOfBirth to be of the unit timestamp which can fit into a unit)
101, "Jack", 845078400, 1234567

With this parameter set, click the create customer and you should see the following printed out below the call:


Result: "0x"

Transaction cost: 129390 gas.

Execution cost: 106454 gas.
This will indicate that the method call has been successful, you can confirm it by checking the count of the customers by hitting the count button (The method call count()). Remember that solidity exposes its public members through a direct call with the signature member().
The call should print out something like:
"0x0000000000000000000000000000000000000000000000000000000000000002"

Transaction cost: 21505 gas. (caveat)

Execution cost: 233 gas.

Decoded:

uint256: 1
This uint256 has a value 1 which indicates that you have a single member in your recordset.
You can run the above createCustomer call multiple times and verify the result. Beware that there is no check on adding duplicate records. This has to be checked by the client.
You can retrieve the customer using the index based getCustomer(0) – remember your index starts with 0. You should see output like this:
Value:

"0x000000000000000000000000000000000000000000000000000000000000006500000000000000000000000000000000000000000000000000000000000000a000000000000000000000000000000000000000000000000000000000325edf80000000000000000000000000000000000000000000000000000000000012d687000000000000000000000000000000000000000000000000000000000000000200000000000000000000000000000000000000000000000000000000000000044a61636b00000000000000000000000000000000000000000000000000000000"

Transaction cost: 23404 gas. (caveat)

Execution cost: 2004 gas.

Decoded:

uint256 id: 101
string name: Jack
uint256 dateOfBirth: 845078400
uint256 social: 1234567
uint256 status: 2
The value being returned is the encoded data that is returned. It is decoded and displayed and parameter values in sequence below.
Now you have a complete working contract that has been tested against some test data.
There are situations when you contract does not work as expected, in which case you have to debug the contract to find out the state of the contract data as method executes and identify the problem. There is currently no solidity debugger. There is a solidity IDE – Mix which has the capability, but it is currently not being supported. You can test it out at your own risk.
Now to deploy your contract to a real ethereum instance and call it using a simple javascript client.
Deploying the contract:
You can refer to a previous article on how to set up local ethereum node using parity. We will use this capability and assume that you have a local running ethereum instance that exposes JSON_RPC port on 8545. We also assume that you have an account created and is returned at accounts[0] location, also this account should have enough ether balance to deploy the contract and execute transaction calls with the gas charges.
The remix IDE gives you the ability to deploy this contract directly from the IDE into the ethereum instance. To do that you have to first select the Web3 provider option from the Environment tab. If the environment is currently picked up you will not see any error below the contract.
Screen_3 (Contract deploy option)
![Introduction to Solidity: Creating a data contract [Part 1]](https://blockgeeks.com/wp-content/uploads/2017/05/screen_3.png)
The IDE gives you three outputs from the contract compilation process BTW the contract is automatically compiled. Ensure you see the options as shown in Screen _3. else it means that compilation has failed, and you should see the compilation error.
The Bytecode is the EVM code that is created when your code is compiled. This is the low-level instruction set that ethereum understands. The second is the Application Binary interface or the ABI of the contract code. ABI is just a list of method signatures, return types, members etc of the contract in a defined JSON format. This ABI is needed when you will call your contract from a real javascript client.
The third option Web3 deploy is the option that lets you push the contract directly onto the node instance. Just select this option and you should see your contract address on the blockchain returned to you.. (Like sreen_2). This contract address is important as it’s needed in the javascript client that you will shortly create. In case you are unable to deploy the contract directly into the blockchain from the ethereum console. Just copy the script in the text area against web3 deploy option and paste onto the console. You should see tone console.log output with “contract mined” followed by its address on the chain.
Running the contract from a real client.
To integrate the contract with your enterprise application code. To do that, you will be creating a simple javascript/html client that can run in the browser. You can also run this client as a nodejs application. This is something I will cover in the later parts of the series.
To communicate with the ethereum blockchain, ethereum exposes a low-level JSON-RPC interface. This interface accepts transactions to the contract. It is a very low level interface so it is hard to work with it directly. There is a javascript framework web3.js that allows higher level contract code abstractions to enable applications to integrate with contract calls.
To enable web3 in a browser supported environment, a single script file needs to be referenced within the page code to interact with the contract.


